All You Need:
Apple Filling
4-6 medium apples (I use 5-6 Rome apples, because that's what we picked at the orchard)
1 Tablespoon lemon juice
1/4 cup white, granulated sugar
1 teaspoon cinnamon
1/4 teaspoon allspice
1/4 teaspoon cloves
1/4 teaspoon nutmeg
1/4 teaspoon powdered ginger
2 Tablespoons all-purpose flour
Pie Crust
I rarely make my own. I use a pre-made store-bought favorite. But feel free to make your own. Make enough to line the bottom of a deep dish 9 inch pie plate.
Streusel Topping
3/4 cup all-purpose flour
1/3 cup brown sugar, packed
1 teaspoon cinnamon
1/3 cup butter, slightly softened
Oven
Deep dish 9-inch pie plate
2 mixing bowls (a large one for the apples and a medium one for the topping)
Chef's knife and cutting board
What You Do:
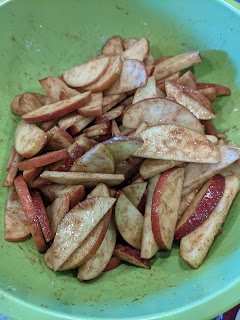
First things first, preheat your oven to 425°. Core and slice the apples to about 1/8 - 1/4 inch thick. You can peel them, if you like. I don't. Partly because I'm lazy and partly because I think it helps them retain their structure while baking. Pour the lemon juice over the sliced apples and toss in the sugar, flour and spices. Set the bowl aside. Press your pastry crust (either homemade or store bought) into the pie plate and pop it in the fridge.
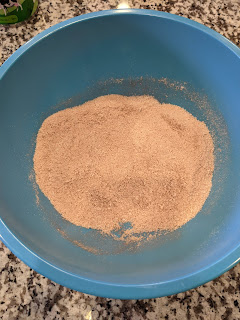
Combine the streusel topping ingredients until it resembles damp sand. You can it extremely well incorporated with no large lumps. Set out the pie plate and arrange the apples in the bottom, being careful to leave as much liquid behind in the bowl as possible. We do not want any of the excess liquid following our apples into the pie. This makes a runny pie and inhibits the caramel development.
The apples should come up to 1/8-1/4 inch from the top of the pie plate. Top with the streusel and everything should be flush with the top of the pie plate. It's going to cook down, and that's fine. Bake in the 425° oven for 20 minutes. Remove and cover the edges with foil or a pie guard while the temperature is reduced to 350°. Once the oven is at 350°, bake for an additional 35 minutes.
You should see some caramel bubbling through the topping at this point. As it cools, the top will cave in slightly. Now, you can either dig in as soon as you can stand it, or you can do what we do: we cool ours completely and chill it overnight. We're masochists and enjoy the torment. It also helps the pie filling set properly (we guess) and keeps it from running around once sliced (we suppose). From there, we slice and serve the pie cold, and warm it slowly in the microwave (2 and a half minutes at 20% power does the trick). Sacrilegious? Possibly, but damn...it's good that way.
The Wordy Bit
Oh, man. So, my husband loves apple desserts. I've made more apple desserts in the past 5 years than I'd ever eaten before then. Typically, his biggest complaint about apple pie is...well, it's his go-to complaint about any dessert: "It's too sweet". I'm not sure he quite gets the concept of dessert, but I do try to appease his lack of a sweet tooth. This is the very first (and probably only) dessert I've made that has gotten him to declare that it's "perfection!". And, if you know anything about the Great British Bake Off, a compliment from my husband like that is like getting a handshake from Paul Hollywood. Anyway, as you can tell, a slice is a bit indulgent, however, not the typical 35+ grams of sugar that apple pie tends to be.
I've made this exact iteration of apple pie twice now, and within the same week. I'm fairly certain that replication means I'm on to something good, so I hope you have as much success with it as I have. I also want to say that I don't like most apple pies because they don't taste of spice. So this one has plenty of spice, but not enough to over-power the apple. Let me know what you think by reaching out in the comments, on Facebook, or on Instagram. Coming soon: sugar free pumpkin pie!


Comments
Post a Comment