Posts

Showing posts with the label homemade

Ooey-Gooey Caramel Apple Pie
Image
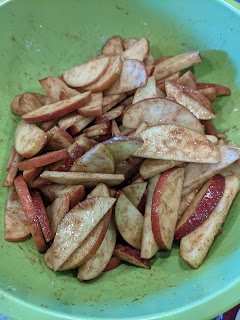
  All You Need: Apple Filling 4-6 medium apples (I use 5-6 Rome apples, because that's what we picked at the orchard) 1 Tablespoon lemon juice 1/4 cup white, granulated sugar 1 teaspoon cinnamon 1/4 teaspoon allspice 1/4 teaspoon cloves 1/4 teaspoon nutmeg 1/4 teaspoon powdered ginger 2 Tablespoons all-purpose flour Pie Crust I rarely make my own. I use a pre-made store-bought favorite. But feel free to make your own. Make enough to line the bottom of a deep dish 9 inch pie plate. Streusel Topping 3/4 cup all-purpose flour 1/3 cup brown sugar, packed 1 teaspoon cinnamon 1/3 cup butter, slightly softened Oven Deep dish 9-inch pie plate 2 mixing bowls (a large one for the apples and a medium one for the topping) Chef's knife and cutting board What You Do: First things first, preheat your oven to 425°. Core and slice the apples to about 1/8 - 1/4 inch thick. You can peel them, if you like. I don't. Partly because I'm lazy and partly because I think it helps them retain the...

My How the Time Flew!

Image
 The Wordy Bit I accidentally took over a month off! How did that happen?? Well, to be perfectly honest, I do know how it happened. Here at our house, it has been a summer full of gardening, cooking, baking, prepping, teen drama, and toddler drama. Not to mention, the Mr. is still working from home, and that can impact the daily flow. As such, the daily flow now looks nothing like it did this time last year. I also can't decide which I prefer: then or now. I truly enjoy having him around more, but our little is still having difficulty grasping the fact that Daddy needs to work. I'm hoping that starting preschool in a few weeks will keep her busy enough to even her out a bit.  That's right, I said preschool. I've been stocking up on supplies, and I even purchased a curriculum (The Homegrown Preschooler). I like the fact that it is all hands-on and craft-based. I even like that there are opportunities to include faith-based learning (I swapped their stuff out for my stuff...

Washable Water Balloons

Image
Materials: Bernat Blanket yarn  Size N/P hook (10.00mm) Tapestry needle (for weaving ends) Scissors Terms to Know: ch - chain st - stitch slst - slip stitch sc - single crochet dc - double crochet dc2tog - double crochet 2 together Pattern (written in US terms): Chain 3 Round 1: 8 DC in the third loop from the hook (Note: this is my "Magic Circle" shortcut); slst to join to the first st Round 2: Ch 2; 2 DC in each st all the way around; slst to join (16 total stitches in this round) Round 3: Ch 2; DC in each st all the way around; slst to join (16 sts total) Round 4:  Ch 2; DC in each st all the way around; slst to join (16 sts total) Round 5: Ch 2; DC2TOG all the way around; slst to join (8 sts total) Round 6: Ch 2; DC2TOG around; slst to join (4 sts total) Round 7: Ch 1; 2 SC in each st around; slst to join (8 sts total) Leave a long tail. Break the yarn and wrap the yarn several times around the "neck" of the balloon before tying off and weaving in the ends. (Thi...

Super Easy No Churn Strawberry Ice Cream

Image
All You Need: 1 1/2 - 2 lbs strawberries, fresh or frozen (hulled and halved) 1-2 Tablespoons white, granulated sugar 2 cups heavy whipping cream 1 can (14 oz) Sweetened, Condensed Milk 1-2 teaspoons vanilla some sort of storage container, 7 cup capacity freezer food processor or blender a hand or stand mixer helps, too What You Do: First things first, we need to heighten the flavor of the strawberries while also removing the majority of the water from them. I do this in a two-step process:  I started by mixing my strawberries (I've used fresh and frozen) with sugar and placing them in the fridge to macerate. With fresh strawberries, this process can take 8-12 hours (or up to 24). With frozen strawberries, you're also wanting them to thaw, so it's best to give them a full 24 hours.  After they have sat in sugar for 24 hours, drain them as much as possible. But do not rinse them! And blend them in a food processor or with a blender. I have blended them...

Is it Junk? Chicken Nuggets

Image
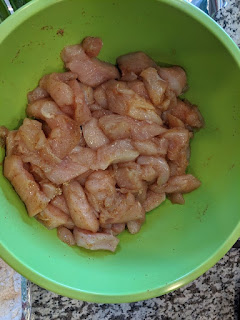
All You Need: 3-4 lbs boneless, skinless chicken breasts  4 large eggs, beaten 2 cups breadcrumbs 2 cups all purpose flour bowls seasoning of choice (about 1/4 cup total) baking sheets oven some sort of storage container freezer What You Do: Preheat oven to 350°. Cut chicken breasts into 1" pieces that are about 1/2" thick. Place cut chicken, flour, beaten eggs, and breadcrumbs in separate bowls and line them up in that order. At the end of your little assembly line, place your baking sheets. (Note: if you have a nonstick baking sheet, great! If not, any baking pan lined with parchment paper will work.)  Divide your seasoning (I use Tony Chachere's Creole Seasoning, but any spice mix or simple salt and pepper would work.) between the chicken, flour, eggs, and breadcrumbs. Mix the seasoning into each bowl completely. Here is a picture of my chicken, and then my assembly line. Using the "wet hand, dry hand" method*, dredge the chicken...

Maker Basics - Basic Stitches, B*tches

Image
Materials: Yarn Whatever size hook that is recommended by the yarn Scissors Patience The Wordy Bit Okay, so you've read over my broad-strokes on yarn. You went to the yarn store (online, hopefully) and found the yarn you want to create with. The label said you need a certain sized hook, so you got that, too....or you dove head first in and bought a bundle of hooks and notions. Either way, you've got yarn and hook in hand and you're ready to go! Right...? Well, if you're not, then this post may not be as informative as you were expecting. Maybe check back next week when I'm doling out my secrets on the perfect chicken nugget. Still here? Grab that yarn and hook, honey, and let's learn some basic stitches! The Slipknot Great band, but we're not here for the music. The foundation of any crochet project starts with a basic slipknot. So, I've got this picture here, and I'm going to explain my process. It seems simple to me, and I hope that...

Wish Pack Costume Prop

Image
Materials: Worsted weight yarn in: yellow, red, aqua, and white Polyfil Cardboard circles (3-4 inch diameter) 3/4" buttons in yellow, red, and aqua Stitch Marker (place in each ch 1 and move every row after ss) Tapestry needle Scissors Terms to Know: MC - Magic Circle sc - single crochet ch - chain dc - double crochet dc2tog - double crochet two stitches together ss - slip stitch sts - stitches hdc - half double crochet Pattern (written in US terms): Pattern scaled for fit on a toddler. Wish Bubbles (Make one in each Yellow, Red, and Aqua) MC (or Chain 2) Round 1: sc 8 in the ring (or second chain from hook); ss to join Round 2: ch 1, 2 sc in each stitch, ss to join Round 3: ch 1, *1 sc, 2 sc in next stitch*, repeat around to marker, ss to join Round 4: ch 1, *1 sc, 1 sc, 2 sc*, repeat around to marker, ss to join Round 5: repeat Round 4 Round 6: ch 1, sc around, ss to join Round 7: ch 2, *1 dc, 2 dc, 1 dc*, repeat around, ss to ...

Springtime Cotton Throw

Image
Materials: Caron Cotton Cakes (I used 3) Size J Hook (6.00mm) Tapestry needle (for weaving ends) Scissors Terms to Know: ch - Chain sts - stitches sc - Single Crochet dc - Double Crochet Pattern (written in US terms): Chain 167; Row 1: sc in second chain from the hook, *chain 2 sts, skip 2 sts on starting chain, sc in next two sts*, repeat instructions between *...* until end of row; sc in last stitch; ch 2, turn. Row 2: DC in first stitch, *chain 2, skip 2 sts, DC in next two sc*, repeat *...* until end of row; DC in last stitch; ch 1, turn. Continue alternating row 1 and 2 until desired length. When desired length is reached, bind off and weave in ends. The Wordy Bit This super easy two row repeat works up so fast! If you prefer a bit more "stable" ends on your work, you can insert a row of sc on the starting chain and end--before and after the pattern. This gives a stronger edge to the work. Here's the difference between a thicker edge ...