Wish Pack Costume Prop
Materials:
Worsted weight yarn in: yellow, red, aqua, and white
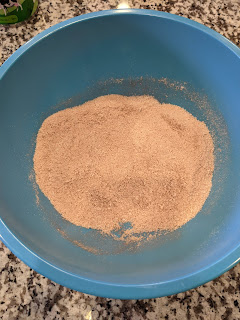
Polyfil
Cardboard circles (3-4 inch diameter)
3/4" buttons in yellow, red, and aqua
Stitch Marker (place in each ch 1 and move every row after ss)
Tapestry needle
Scissors
Polyfil
Cardboard circles (3-4 inch diameter)
3/4" buttons in yellow, red, and aqua
Stitch Marker (place in each ch 1 and move every row after ss)
Tapestry needle
Scissors
Terms to Know:
MC - Magic Circle
sc - single crochet
ch - chain
dc - double crochet
dc2tog - double crochet two stitches together
ss - slip stitch
sts - stitches
hdc - half double crochet
Pattern (written in US terms):
Pattern scaled for fit on a toddler.
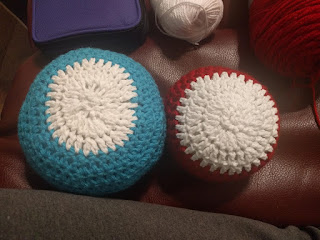
Wish Bubbles (Make one in each Yellow, Red, and Aqua)
MC (or Chain 2)
Round 1: sc 8 in the ring (or second chain from hook); ss to join
Round 2: ch 1, 2 sc in each stitch, ss to join
Round 3: ch 1, *1 sc, 2 sc in next stitch*, repeat around to marker, ss to join
Round 4: ch 1, *1 sc, 1 sc, 2 sc*, repeat around to marker, ss to join
Round 5: repeat Round 4
Round 6: ch 1, sc around, ss to join
Round 7: ch 2, *1 dc, 2 dc, 1 dc*, repeat around, ss to join
Round 8: ch 2, dc around, ss to join
Round 9: ch 1, sc around, placing stitch in the third loop (to turn the side), ss to join
Insert cardboard circle in the bottom.
Round 10: ch 2, dc around, placing a dc2tog every 10 sts, ss to join
Round 11: ch 2, dc around, placing a dc2tog every 7 sts, ss to join
Round 12: repeat Round 11
Round 13: repeat Round 11
Round 14: ch 2, dc around, placing a dc2tog every 5 sts, ss to join
Change color to white:
Round 15: ch 2, dc around, placing a dc2tog every 3 sts, ss to join
Round 16: ch 2, dc around, placing a dc2tog every 2 sts, ss to join
Stuff with polyfil and sew closed.

Strap
Using Yellow, ch 102 (or however long it needs to be to fit)
Row 1: hdc starting in the third chain from hook (100 sts); ch 2; turn
Rows 2-4: hdc 100 across; ch 2; turn
Row 5: hdc 100 across, fasten off.
Wish Button
Using white, MC or ch 2
Round 1: sc 6 in mc or second chain from hook, ss to join
Round 2: ch 2, 2 dc in each stitch, ss to join
Round 3: ch 2, *dc, 2 dc*, repeat, ss to join
Change to red:
Round 4: ch 1, sc around, ss to join; fasten off.
Using yarn that matches the buttons, arrange buttons on white disk and sew into place.
Put It All Together!
Sew the colored Wish globes together, making sure the flat bottoms are all on the same side, with the white circles pointing up. Adjust the strap to the necessary length to fit and sew to joined globes. Position white disk to proper space on strap and sew on using white yarn.


The Wordy Bit
Woo! This was a bear to write...but, then again, it was a bear to figure out. See, last year, my daughter had her heart set on being True from True and the Rainbow Kingdom for Halloween. The problem was, no matter where we looked, we couldn't find a good prop for the wish pack. So, we built her entire costume. The clothing was easy enough to find, and the headband was a cinch. The biggest hurdle was the pack. I found a couple patterns on Etsy, but they weren't really to my daughter's taste. So, on the experiments went. I freehanded the entire thing, taking plenty of breaks and measurements...and test fitting. I got loads of feedback, not only from my daughter, but from my husband. (He doesn't craft, but he's got an artist's eye) It took a couple tries to get the shape and dimensions of the globes just right, and that was the hardest part.
I originally tried to make the Wish Button on the front an actual button, but it didn't work out. I also realized the prop was more secure with the strap in one piece, rather than as a belt-like piece. Also, some work has to be put into placing the strap properly on the globes to allow the pack to sit in the correct orientation. But those are minor adjustments that will be unique to each piece made.


I originally tried to make the Wish Button on the front an actual button, but it didn't work out. I also realized the prop was more secure with the strap in one piece, rather than as a belt-like piece. Also, some work has to be put into placing the strap properly on the globes to allow the pack to sit in the correct orientation. But those are minor adjustments that will be unique to each piece made.


Comments
Post a Comment